Hello! I'm Lynn.
  • About Me
  • Work With Me
  • Contact Me
  • Subscribe
  • Home
    • About
    • Contact
    • Disclaimer
    • Terms & Conditions
    • Privacy Policy
    • Subscribe
      • Work With Me
        • Media Kit
        • Portfolio and Samples
  • diy
  • lifestyle
    • home decor
  • recipes
  • gifts, parties & holidays
  • health & wellness with lynn

Lynn Mumbing Mejia

Crafting coziness, one recipe, DIY project, and holiday celebration at a time.

recipes · July 25, 2024

Halloween Eyeball Jello Cups

*This post may contain affiliate or sponsored links, which means I may get paid or receive a commission if you purchase through my link, at no extra cost to you!*
Jump to Recipe Print Recipe

Read more for all the details on Halloween Eyeball Jello Cups.

Are you a spooky or cute Halloween person?! I used to love scary movies but now I am a big scaredy cat! These Halloween Eyeball Jello Cups surely do not scare me and they are in fact such an easy and fun dessert to make!

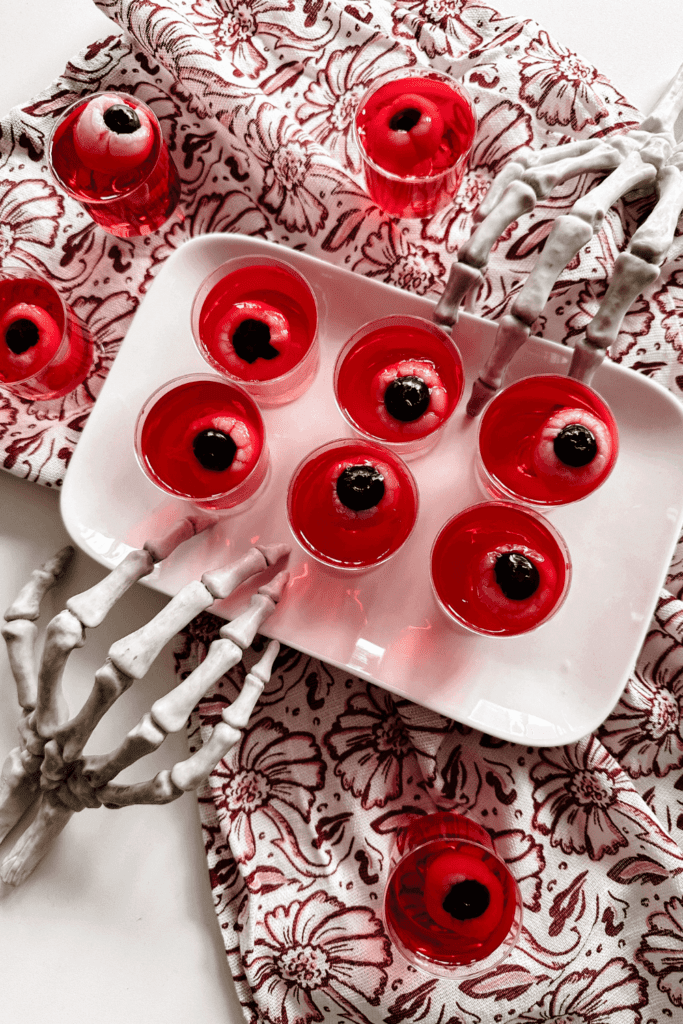
Halloween is the perfect time to get creative in the kitchen, and what better way to delight and spook your guests than with Halloween Eyeball Jello Cups? These creepy yet delicious treats are a hit at any Halloween party, blending the fun of spooky decorations with the joy of a tasty dessert. Easy to make and visually striking, these jello cups will be the star of your Halloween spread.

Whether you’re hosting a Halloween bash or looking for a fun cooking project with the kids, Halloween Eyeball Jello Cups are a fantastic choice. They’re easy to make, fun to assemble, and sure to impress with their spooky yet playful presentation. Dive into the Halloween spirit with this delicious and eerie treat, and watch your guests’ faces light up with both delight and fright!

With Halloween Eyeball Jello Cups, you’re guaranteed to add a memorable and spooky touch to your Halloween celebrations. Enjoy the fun of making and eating these ghoulishly good treats!

PIN Halloween Eyeball Jello Cups FOR LATER:
Halloween Eyeball Jello Cups - Lynn Mumbing Mejia - Pin 1

This Halloween Eyeball Jello Cups recipe is accompanied by a YouTube Tutorial. If you haven’t subscribed to me on YouTube, don’t forget to!

Table of Contents

Toggle
  • HERE IS HOW TO MAKE HALLOWEEN EYEBALL JELLO CUPS:
  • WHERE CAN I FIND THESE INGREDIENTS?
  • WHAT ARE THE INGREDIENTS?
  • WHAT EQUIPMENT DO I NEED?
  • CAN I SUBSTITUTE/ADD ANYTHING OUT?
  • WHAT DOES HALLOWEEN EYEBALL JELLO CUPS TASTE LIKE?
  • HOW LONG DOES IT KEEP FOR?
  • INSPIRATIONS FOR THIS RECIPE?
  • ANY OTHER NOTES?
  • Halloween Eyeball Jello Cups
    • Ingredients  
    • Instructions 

HERE IS HOW TO MAKE HALLOWEEN EYEBALL JELLO CUPS:

WHERE CAN I FIND THESE INGREDIENTS?

Although this recipe is super easy since it only really has 3 ingredients, the ingredient that may be the hardest to find would be canned lychee! I’m not quite sure if it is popular in all parts of the world but definitely most popular in Asia as well as becoming more popular in North America! It may not be in your local grocery store, but you can almost always find this in an Asia supermarket!

Aside from the lychee, all you’ll need is Strawberry or Cherry Jell-o, blueberries and plastic cups!

WHAT ARE THE INGREDIENTS?

The ingredients to make these delicious Eyeball Jello cups are:

  • Red Jell-o (Strawberry, Cherry or Raspberry are all good options)
  • Lychee (Canned is easier to find but fresh is great as well)
  • Blueberries
  • Plastic Cups (4-5oz is good)

WHAT EQUIPMENT DO I NEED?

You don’t need any equipment for this recipe but kitchen utensils wise, it would be good to have a ladle or soup spoon for easier scooping, a large bowl to mix the Jell-o mixture and access to boiling water as per the Jell-o instructions!

CAN I SUBSTITUTE/ADD ANYTHING OUT?

This fun Halloween treat is super easy and great for parties! You sure can subtitute or add anything you’d like! If you want to do an assortment of different Jell-o flavours, that would be super fun! You can do green, blue, purple, orange or even yellow!

I did not add this as I wanted to keep it as simple as I possibly can but to take it the extra mile, you can also make some red icing or use a cookie icing pen and draw some veins on the eyes! I liked the simplicity of just the eyeball floating in there but it would take the creativity up for sure!

I made these alcohol-free however, you can easily make these into jell-o shots and add some alcohol for your Halloween party! You would basically just need to do half Vodka or whatever alcohol and half cold water based on the package instructions!

WHAT DOES HALLOWEEN EYEBALL JELLO CUPS TASTE LIKE?

Halloween Eyeball Jello Cups combine the sweet and fruity flavors of gelatin with the unique texture and taste of lychee and blueberries. The gelatin provides a familiar, smooth, and jiggly base, while the lychee adds a subtle, slightly floral sweetness. The blueberries add a fresh touch to the sugaryness of both the canned lychee and the Jell-o making each bite a fun and deliciously creepy treat perfect for Halloween festivities.

HOW LONG DOES IT KEEP FOR?

Halloween Eyeball Jello Cups can last for about 3-5 days when stored in an airtight container in the refrigerator. Enjoy them fresh for the best texture and taste! One thing I absolutely adore about this recipe is that it is perfect to make ahead of time! First, jell-o on its own already needs time to chill and set in the fridge but you can easily make this a few days earlier if you’re having a Halloween party or attending one and you’re pressed for time the day or two leading to the event!

I don’t find the flavour is compromised at all! Just be sure to pat the lychee and blueberries dry to avoid added moisture but totally not a big deal if the jell-o is a bit wiggly!

INSPIRATIONS FOR THIS RECIPE?

Yes! I was trying to brainstorm some ideas for Halloween and I remember a few years back, I made this Halloween Party Punch with Fruity Eyeballs recipe and loved creating the fruity eyeballs! I was so proud of how they turned out and thought it would be so cool to make them into bloody looking jell-o cups!

I am also so proud of how these turned out and how easy it is! Perfect for an October night or party!

ANY OTHER NOTES?

Everything I can think of is in this post so no other notes! Hope you enjoy making these!

Halloween Eyeball Jello Cups

Halloween Eyeball Jello Cups: Fruity gelatin cups with lychee and blueberry "eyeballs," perfect for a spooky, fun, and delicious Halloween treat!
Print Recipe Pin Recipe
Prep Time 30 minutes mins
Chill Time 4 hours hrs
Course Dessert
Servings 18 Cups

Ingredients
  

  • 1 Can Lychee 560ml
  • 1 Package Red Jell-O
  • 1 Package Blueberries
  • 15-20 4-5oz Mini Plastic Dessert Cups

Instructions
 

  • Prepare the Jell-o as normal per package instructions then set aside to let cool. Make sure it has cooled fully so you don't melt your plastic cups!
  • Strain your canned lychee (save the syrup if you'd like to make drinks or use for other desserts) and gently pat them dry.
  • Add one blueberry to each lychee ball opening with the blueberry facing up.
  • Once fully cooled, add your Jell-O mixture to each little dessert cup about 3/4 of the way full.
  • Next, you can either add your lychee/blueberry balls in immediately (they may turn over or not sit right at the top so you may need to adjust them a little bit or fix them when the jello sets more) or you can wait an hour or two until the jello has set a little bit and stick the lychee/blueberry balls in.
  • Let set in the fridge for minimally 4 hours then serve and enjoy!
Keyword Halloween Eyeball Jello Cups

Create a spooktacular treat this Halloween with these Eyeball Jello Cups! Easy to make and delightfully eerie, they’re sure to be a hit at any Halloween party. Dive into the fun and enjoy a frightfully delicious dessert!

Xo,

Lynn

Are you going to try making this Halloween Eyeball Jello Cups recipe?! Don’t forget to tag me if you do!

Tag Us - Halloween Eyeball Jello Cups

This blog post is all the details on Halloween Eyeball Jello Cups.

P.S: If you haven’t read my most recent post, click here!

PIN Halloween Eyeball Jello Cups FOR LATER:
Halloween Eyeball Jello Cups - Lynn Mumbing Mejia - Pin 2

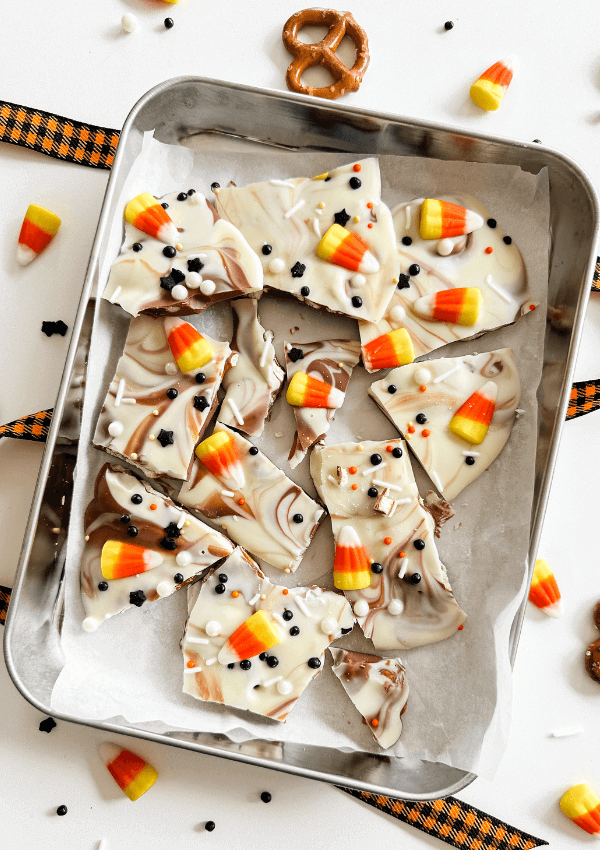
If you liked reading Halloween Eyeball Jello Cups, you might like these are well!

Halloween Ice Cream Sandwiches

Halloween Candy Corn Pretzels

Spooktacularly Easy Halloween Cake Mix Cookies

Easy Halloween Fruit Tray – Pumpkin Shaped

Baked Healthy Halloween Corn Tortilla Chips

Halloweentown’s Pumpkin Spice Chocolate Chip Cookies

Easy Halloween Treat Board

Halloween Party Punch with Fruity Eyeballs

Halloween Mummy Hot Dogs

This is the end of Halloween Eyeball Jello Cups.

Shop The Post

Posted In: recipes · Tagged: easy halloween party food, easy halloween recipes, easy halloween treats, eyeball jello, eyeball jello shots, halloween desserts, halloween eyeball jello, halloween party, halloween recipes, halloween treat, halloween treat recipes, halloween treats, jello cup recipes, jello recipes, jello shots, spooky recipes

Get on the List

You’ll Also Love

Halloween Pretzel Bark
Mummy Garlic Bread
Halloween Pillsbury Jalapeno Popper Mummies

Trackbacks

  1. Easy Halloween Ice Cream Sandwich Graves | Lynn Mumbing Mejia says:
    July 26, 2024 at

    […] P.S: If you haven’t read my most recent post, click here! […]

    Reply
  2. Halloween Finger Hot Dogs | Lynn Mumbing Mejia says:
    July 26, 2024 at

    […] Halloween Eyeball Jello Cups […]

    Reply
  3. Halloween Pillsbury Jalapeno Popper Mummies | Lynn Mumbing Mejia says:
    September 10, 2024 at

    […] Halloween Eyeball Jello Cups […]

    Reply

Leave a Reply Cancel reply

Your email address will not be published. Required fields are marked *

Recipe Rating


Next Post >

DIY M&M Costume

About Photo
Hey there friend! My name is Lynn and I'm a Canadian Content Creator who's focused on Minimal & Neutral Home Decor Inspo, Simple & Budget Friendly DIY Projects, All Things Holidays and Quick & Easy Recipes. I'm so happy you're here and I hope you'll find something that you love!

Categories

follow lynn

  • Facebook
  • Instagram
  • Pinterest
  • Twitter
  • YouTube

Search

Join Us!

Trending Now

Popular Posts

Links

  • About
  • Contact
  • Disclaimer
  • Privacy Policy
  • Terms & Conditions

Socials

  • Instagram
  • Youtube
  • Facebook
  • Twitter
  • Pinterest

Shop

  • Home Wall Art
  • Recipe Cards
  • Greeting Cards
  • Planner Templates

JOIN THE INNER CIRCLE

3 Ingredient Crunchy Furikake Chickpeas! High Fibe 3 Ingredient Crunchy Furikake Chickpeas! High Fiber High Protein Snack!! 🍙

INGREDIENTS
* 1/4 Cup Chickpeas (dehydrated then rehydrated for 24 hours or canned)
* 1-3 Tbsp Furikake Seasoning put as much as you’d like! I put extra on mine <3
* 1 Tbsp Avocado Oil or any oil you prefer!

INSTRUCTIONS
* In a bowl, add in your chickpeas and oil. Mix well together so that every chickpea is coated in oil.
* Add your chickpeas in a single layer in your air fryer. Air fry at 400F for about 10-15 minutes depending on your preferred level of crunch!
* Pour chickpeas into a bowl and add in your furikake seasoning to toss in.
* Serve and enjoy!


chickpeas recipe, chickpeas recipe, healthy snacks, high fiber snack, high protein snack, weight loss snack, weight loss recipes,
Easy DIY Ribbon Garland 🎀 Bows have been the o Easy DIY Ribbon Garland 🎀

Bows have been the ongoing trend for a while now and I am obsessed! I have always been girly girly and have loved bows for so long. It makes make super excited to see everyone embracing bows as a decor trend! 

STEPS TO PUT TOGETHER THIS EASY DIY RIBBON GARLAND:
Step 1: Cut Strips Of Ribbons To Your Desired Size Of Bow
I cut about 25-30cm strips and cut about 20 to 30 of these according to how long my shelf was. You can measure the place you’d like to hang your ribbon garland for more accuracy in sizing.
Step 2: Tie Your Ribbons In The Way That’s Easiest For You
I honestly watched so many ribbon tutorials and I found that this video from Tiktok was the easiest for me to follow! There are so many ways to create little bows so just pick the way that’s the easiest for you!
Step 3: Ensure That Bow Length Are Similar In Size 
I cut the ends of the bows to make sure that the bows are similar in size. It does not need to be perfect, and of course, you can leave it as is but I like to make them slightly similar in size.
Optional: I like to heat seal the edges of the ribbons or they don’t fray!
Step 4: Glue Ribbon Together To Desired Length Of Garland
Glue the sides of the bows together until they form a garland to your desired length. 
Step 5: Hang Up And Enjoy Your Craft!
Hang the garland in your desired place in your home and admire a job well done!

diy bow, bow garland, viral bow garland, diy, diy ribbon bow, satin bow garland, garland diy, bow, ribbon bow diy, garlands, how to make a bow, anthropologie satin bow garland, diy, diy crafts, easy crafts, handmade crafts,
Easy Asian Haddock Fillets! - Low Calorie, High Pr Easy Asian Haddock Fillets! - Low Calorie, High Protein Recipe + Great For Weightloss! 🐟

This Easy Asian Haddock is a simple yet flavorful dish that’s perfect for a quick weeknight dinner or a light meal. The haddock fillets are seasoned with a savory blend of soy sauce, ginger, garlic, and sesame for a perfect balance of salty and umami flavors. After a quick marinade, the fish is baked until it’s perfectly tender and flaky.

INGREDIENTS
* 3 Haddock Fillets
* 2 Tbsp Soy Sauce
* 1 Tbsp Fresh Ginger roughly chopped 
* 1 Tbsp Fresh Garlic roughly chopped 
* 1 Tbsp Sesame Oil
* 1/2 Tbsp Sesame Seeds
* 1/2 Stalk Green Onions roughly chopped

INSTRUCTIONS
Marinate
* In a small sauce bowl, add in your soy sauce, fresh ginger, fresh garlic, sesame oil, sesame seeds, and green onions and mix well together. 
* In an airtight container, gently add in your haddock fillets and pour marinade over and ensure that every piece of fish is coated. 
* Store in the fridge for minimally 20 minutes.

Bake
* Once your fish has marinated for minimally 20 minutes, preheat your oven to 400F and prepare a baking tray. 
* Place your fish on the baking tray spaced apart and pour all the marinade over top.
* Bake for 15-18 minutes or until fish is fully cooked! 
* Serve and enjoy!

haddock, haddock recipes, how to cook haddock, haddock fillets, baked haddock, asian recipe, easy recipe, asian food, food recipes, quick recipe, fast recipe, fish recipe, easy fish recipe, baked fish recipe, fish recipes for dinner, easy dinner ideas, healthy dinner ideas,
4 Ingredient Mini Chocolate Peanut Butter Puff Pas 4 Ingredient Mini Chocolate Peanut Butter Puff Pastry Bites! 🍫🥜 - Easy Peanut Butter Dessert Idea!

Mini Chocolate Peanut Butter Puff Pastry Bites are the ultimate indulgence for any sweet and savory lover. These bite-sized treats combine a crispy, golden puff pastry shell with a rich, creamy peanut butter filling, topped with sweet decadent chocolate chips. These are dangerously so good! 🫶🏼

INGREDIENTS
* 1 Puff Pastry Sheet cut into 12 mini circles 
* 3/4 Cup Peanut Butter 1 Tbsp in each puff pastry bite 
* 1/4 Cup Semi-sweet Chocolate Chips 4-5 chocolate chips in each puff pastry bite 
* 1 Tbsp Powdered Sugar

INSTRUCTIONS
* Preheat oven to 375F and prepare your mini muffin pan. 
* Cut out 12 mini circles or shapes out of your puff pastry and place each in a mini muffin pan. Make sure that the bottom is pushed down inside the mold. One sheet for me allowed me to cut out 12 flower shapes. 
* Add a Tbsp of peanut butter into each tart and add in 4-5 chocolate chips in each.
* Bake for 12-15 minutes or until the puff pastry is golden brown. 
* Let cool for a few minutes then sift powdered sugar on top. Serve and enjoy!

peanut butter, peanut butter dessert ideas, chocolate peanut butter 4 ingredient desserts, 3 ingredient desserts, simple dessert recipes, peanut butter dessert recipes, quick dessert recipes, puff pastry recipe, chocolate puff pastry, easy puff pastry, pastry baking, puff pastry snacks, puff pastry desserts, simple puff pastry recipes,

Copyright © 2025 Lynn Mumbing Mejia · Theme by 17th Avenue